Bear Mountain
Shadow Wolf heads to Bear Mountain to rescue his cousin Red Harlow.
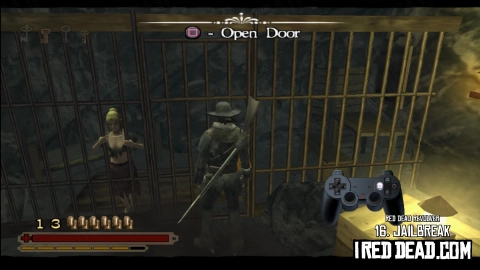
Chapter 15
"Bear Mountain was the original homeland of the Red Wolf tribe. The bones of the tribe's ancestors rest in the sacred woods on the northern slopes of the mountain."
You'll be in control of Shadow Wolf for this level.

Shadow Wolf approaches the elders of the tribe, telling them "My fathers, I have news".

"What is it, Shadow Wolf?" asks Chief Running Moon.
"Cousin Red is alive! I saw the devil Diego take him prisoner to the mines" explains Shadow Wolf.
"You must help him then. Go, Shadow Wolf, but beware of the ghost devil" explains the elder as Shadow Wolf leaves them.
You must successfully pass at least 3 of these 4 targets.
- Accuracy: 66%
- Damage Taken: 50%
- Time: 10:00
- Best Combo: $200
Once the level starts, you'll be in control of Shadow Wolf. He comes equipped with a Sacred Bow which allows you to fire arrows at the enemies and eliminate them silently.

Ideally you should approach this level in a stealthy way, which will require you to sneak around by pressing L3 to crouch, and to take out the enemies who block your path from a distance and ignore the ones who don't. You're free to go in gung-ho though, but you'll end up taking more damage and need to kill a lot more enemies, however it will allow you to get through the level quicker.
In Bounty Hunter mode, you need to complete the level without being detected by the enemies, so practicing stealth is definitely worth doing.
Continue around the corner from the start of the level and you'll spot a soldier on the ground level and another on the tree / bridge above. Take them both out with arrows then climb the rocks on the right and follow the path to the end.

Higher up the hill is another enemy carrying a torch, so fire an arrow and take him down, then crouch down as you sneak up the hill to his position.

When you reach the top, you'll spot two soldiers near a camp fire who are asleep, albeit standing up. If you stay crouched and don't get too close to them, you can sneak past them without waking them up.

Before you drop down to the enemies near the campfire, there's a small path that leads to the right. At the end, you'll find a small cave in the rock with a chest (like those in Rogue Valley) which you can shoot with an arrow to open. It'll reward you with a new weapon, Annie Stoakes' "Faith" rifle, which can prove useful, particularly later in the level.
Continue past the campfire and you'll come to a small tunnel through the rock at the back of the area. It's hard to see but once you try to make your way up the rocks at the back of the area it will become clear.

Just through that tunnel will be two soldiers on patrol. Keep an eye out for their flaming torches and take them down when you can.

Continue around the corner but be aware there'll be another soldier who will eventually patrol your way, so get ready to take him down as soon as you see him too.
Head into the cave where you'll find another enemy, then another further down the path, around the corner.
If you get spotted, you should be able to take out the soldiers with your arrows without alerting everyone, but as soon as a gunshot is fired, you're pretty much screwed and they'll all be on the hunt for you. At this point you might want to switch to a gun rather than the bow if you have one.
Follow the path and eventually you'll need to cross a tree which acts as a bridge over the river to another camp site. There are two soldiers waiting there, one is asleep, so take out the awake one first then shoot the sleeping soldier as he wakes up.

If you say crouched and keep as far to the left as you can from here (the game won't let you fall off the cliff), you can work your way down the rest of the hill to the water without being spotted, even as you sneak past a campfire surrounded by enemies.
Once you reach the water, climb up the rocks and continue upstream. An enemy will appear further up the river, and as you make your way up, another will appear around the corner, followed by one more as you reach the top.

From there you'll need to climb up some rocks to the right where you'll encounter two more enemies then pass through a small cave.
You'll then reach another camp fire area with four final enemies who can be take down with arrows from a distance along the river.

Once they're all down, continue to follow the river to the end.

In Bounty Hunter mode, the challenge will end here - assuming you did it all without being spotted - however in story mode, you're now moving onto the boss fight.
Shadow Wolf approaches a waterfall area where he sees a large man with claws and wearing the head of a bear as a hat.

Grizzly's health bar is displayed on the right of the screen. Personally I didn't find this boss fight too challenging as he generally stays at range. He'll jump onto the various totem pole pillars and ledges scattered around the area, so all you need to do is prepare to pepper him with arrows whenever he stands still for too long. You can also press R2 to light your arrow on fire if you have Deadeye bars which can cause him a bit of burn damage and stun him too.

Keep firing arrows at him, aiming for headshots as always, and if he does charge at you on foot, back away and try to avoid his claw attacks by dodge-rolling. He'll also throw knives at you which can gradually eat away at your health. If you opened up the secret chest earlier, using the Faith rifle is a good way to quickly take down his health bar.

Keep firing away and eventually you'll take him down.
Shadow Wolf checks on, and then scalps Grizzly before heading through the waterfall into Bear Mountain's mine.

The following rewards are unlocked on the score screen after passing the mission.
- Completion
- Bounty: Grizzly - $550
- Good Rating
- Showdown Character: Shadow Wolf
- Excellent Rating
- Showdown Character: Standing Snake + Shop Item: "Arrowhead"
After completing the story, you'll be able to replay each mission in "Bounty Hunter Mode" which includes an optional objective to complete. Beating the mission and completing the objective will provide a reward.

- Objective
- Get to the source of the river without alerting the patrolling guards.
- Reward
- Showdown Character: Grizzly + Shop Item: "Necklace"
Tips
This can be quite a time consuming challenge as you'll need to be extra careful not to be spotted. You can still kill the enemies with your bow, but ensure it's not right in front of one of their buddies. You'll only actually fail if they physically spot you, but seeing someone get killed will put them in a bit of a frenzy making it more likely they'll look in your direction.
You should always ensure you're crouching by pressing L3. You'll encounter a number of enemies who are standing up asleep with little z's coming out of their mouths and you can sneak right past them as long as you're crouching.
There are a number of enemies who will move around carrying a burning torch however and it's best to take them out from a distance where possible.
Bounty Hunter Walkthrough
First off, kill the enemy right around the corner from the start of the level, and the enemy on the higher level up to the left.
Climb the rocks to the right and continue ahead towards the far end of the area - not left up the bridge made out of a fallen tree. On the way, you'll spot another enemy higher up to the left, so take him down with your bow.
Follow the path around and up to where the guy you just killed was and you'll encounter two enemies who are standing up asleep. Stay crouched and you can sneak past them. As you drop down the rocks, be aware that you might stand up again so remember to crouch before you start walking. Directly behind the both of them at the back of the area is a small tunnel you can head through.
Be careful as you reach the end of the tunnel as an enemy carrying a torch will appear almost directly in front of you. I recommend you go through the tunnel with your bow out and ready. Take him down as soon as you see him, but stay where you are as another enemy will follow a few seconds behind.
You'll now need to exit the tunnel and start following the path where those two enemies were, but just as you turn the corner, another enemy will start coming towards you. He'll only start coming when you reach the corner though, so you need to go there to trigger him. As soon as you spot his torch, prepare to fire your bow and hit him before he spots you. You could move back towards the tunnel and wait for him to turn around then shoot him in the back as he moves back into the cave around the corner.
Continue around the corner and you'll head into a small cave. If you didn't kill him outside, there'll be an enemy in here, but he might be heading away from you when you get there. To be safe, don't go out into the open and try to rotate the camera so you can see where he is before you go into the open.
Once he's dead, follow the cave but be careful as you reach the corner as another enemy will approach you. Backtrack into the cave and wait for him to show himself before you take him down.
At the end of the path you'll come to a camp with more enemies. There's a big guy just across a small bridge, with another man standing up asleep next to him. Kill the big guy first, then the other guy will wake up, so quickly kill him too before he spots you.
For the next section you don't need to worry about being spotted or killing anyone as long as you stay crouched. Stay as far left as you can - the game won't let you walk off the cliff - and just sneak your way down to the water at the end.
As you jump up the small rocks to the river, move very slowly as an enemy will appear further up the river. Backtrack if you want to be extra safe and take him down with your bow.
You'll need to head up to about the half way point of the river to trigger the next enemy and you should hear him talking so you'll know he's coming. Once again, backtrack down the river to create some distance and take him down when he appears.
There's now one final enemy in the water, just around the corner up river. You'll need to get close to the corner so he starts coming, but don't go out into the open or he'll spot you and you'll fail, forcing you to do the whole thing again (trust me, I know!). Once you know he's coming, backtrack down the river again and shoot him with your bow when he appears.
Continue around the corner to the end of the river and you'll have to jump up some rocks to the right. Be careful though because an enemy will patrol this area. Carefully edge your way around the cliff face and if you see him coming by rotating the camera, move back towards the river and draw your bow so you can shoot him the second he becomes visible around the corner.
Just around the corner is another cave and there's an enemy in here who will probably be walking away from you, but make sure you're careful and use the camera to see where he is before you enter. Take him down with your bow and carefully continue through the cave. Stop before you drop down into the water at the end though because there's another enemy patrolling the small river. Use the camera to see when he turns around then pop an arrow in his back.
You're at the final section now. There are three enemies at a camp near a fire. If you stay in the river near the cave entrance, you can shoot most of them without them spotting you. They might go into a bit of a frenzy and start looking for you, but you're generally safe from them if you don't get too close.
Once they're all dead, continue along the river and jump over a small rock then you should get the "Bounty hunter goal reached!" message.
All Bounty Hunter challenges are much easier if you unlock and enable the "Invincibility", "Infinite Deadeye" and "Golden Gun" cheats. For more info, read about Cheats in Red Dead Revolver.
Next Mission