Freak Show
Jack Swift rescues a young woman in Widow's Patch following a gun battle with Professor Perry.
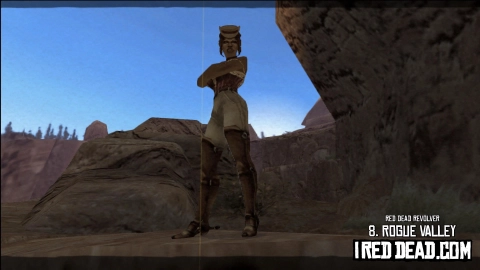
Chapter 7
"Once upon a time, Widow's Patch had all the right features. Nowadays, the few honest folk left, lock their doors at night."
For this level, you'll be controlling Jack Swift and will see a unique loading screen featuring him.

Jack Swift arrives at Widow's Patch at night to find a young woman tied up near the water tower. She screams "You cowards! Somebody let me free!". Jack pulls out his twin-revolvers and approaches. The woman spots him and calls out "Oh, Mister, mister, please! You got to cut me loose! Mister, please!".

Jack carefully approaches the woman but the second he grabs hold of the rope to free her, a knife flies past his head, getting stuck in the wooden frame of the contraption used to hold her.
You must successfully pass at least 3 of these 4 targets.
- Accuracy: 60%
- Damage Taken: 100%
- Time: 5:50
- Best Combo: $200
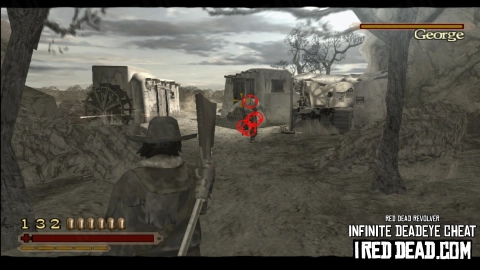
The level immediately starts in a mini-boss fight with "Slade". You're controlling Jack Swift, who is the first character we've been able to control besides Red so far. He comes equipped with twin Revolvers, allowing him to fire twice as many shots before reloading.

Jack Swift is able to use a slightly modified version of Deadeye. If you aim towards enemies and press R2, he'll automatically lock targets on them without going into the slow motion you get with Red. Because he can fire off 12 shots from his twin revolvers, you'll be able to target 12 points across any enemies you can see. This allows you to take out 2 or 3 enemies very quickly and build up quite a decent combo.
The mini-boss fight with Slade is interrupted by random enemies, such as the clowns from the previous level, who appear from behind the buildings and get involved. Try to focus on Slade, but take out the other enemies when you can. They'll drop weapons and ammo, but also health when you're running low, and killing them will give you cash and boost your deadeye meters.
The additional enemies will keep coming throughout the level - you can't just kill them all and be done with them. Your focus should always be on the main boss in front of you, but when you start to get overwhelmed, it's definitely worth killing the clowns. They don't take many bullets to put down and your Deadeye is practically made for wiping out a group of them at once.
Slade doesn't cause too much damage to you and mainly throws knives from a distance, but he has a decent sized health bar so you'll need to hit him with quite a few headshots before you take him down. Once you get him to around half health, a cutscene will kick in.
A man jumps out of a white building holding a flaming torch, asking "Who's up for some barbeque?" before setting the building on fire, which immediately explodes and bursts into flames.

A new health bar is added to the screen for "LaRouche" so you've now got 2 mini-bosses on the go at the same time.

Given Slade is already at half health, try to focus on him. A few more shots should take him down.

Then you can focus your attention on LaRouche. Get close to him and a couple of full Deadeye shots should wipe out his health fairly quickly.
A man calls out to Jack from on top of the water tower "Jack! What an unpleasant surprise". Jack fires a shot towards him, but he disappears in a poof of green smoke.

The man reappears at the other side of the town, on the roof of the burning building, and says "That wasn't very nice Jack. Don't bet on making it out again".

You're now in a proper boss fight with Perry, but there's a smaller additional mini-boss called Atlas who you'll have to deal with too. Atlast walks really slowly and a carries a large metal shield so if you can get behind him and shoot his body before he turns around, it's the quickest way to get his health down. You can also try to target his head over the top of the shield. His health bar is small so 5 or 6 decent shots should take him out.
The Perry boss fight is a bit more frustrating as he teleports around frequently. By the time you spot him and prepare to aim, he'll disappear in a poof of smoke again.
Occasionally he'll run across the ground, which is the best chance for you to get close and use Deadeye to target him and fill him with lead. You might be able to take out 20% or so of his health bar like this but then he'll disappear and respawn somewhere else. Keep an eye out for his green smoke which shows where he is. Thakfully it stands out quite well in the darkness of the night.
Don't waste your Deadeye when he's at a distance. Save it for when you can get close to him. Often you'll target him and he'll disappear before you can even get a shot off. I personally prefer to hang around the water tower and wait for him to spawn on top of it.
Once you get his health down to about 75%, a cutscene will kick in.
Perry reappears on the water tower and says "Time for a little pick me up I think. My boys will keep you busy" before he takes a drink from his glowing green bottle.
The camera cuts to some clowns entering the area with pistols drawn.

This marks the start of more respawning clown enemies. You'll also notice that Perry's health has been refilled thanks to the potion he drank.

Kill the clowns. Try to use regular gunfire rather than Deadeye as killing them will help you fill up your Deadeye meter to use on Perry, but if you start to get overwhelmed use Deadeye on the clowns. You'll wipe most of them out at once and they'll provide ammo and occasionally health bottles.
Keep an eye out for Perry running across the ground again. He'll usually go between the water tower and the row of buildings to the right. Run up to him and target him with Deadeye. This time a full load of shots should take his health down to around half way. If you're lucky, he'll be stunned and you can lock on with another round of Deadeye shots to get him down to about 30% health before he disappears in another poof of green smoke.
Perry shows up on top of the water tower again with his magical potion, telling Jack "All this excitement has made me quite thirsty!" as the camera cuts to more enemies joining the fight, mainly on the balcony of the restaurant.

Perry's health will go back up to about 75% thanks to his potion but you'll need to focus on killing the new batch of clowns and other shooters. Take out as many as you can, but keep an eye out for Perry who may appear on the ground near Katie, giving you a good chance to target him with Deadeye and get his health back down to 30% or so.
He'll probably disappear again and you'll need to take out a number of respawning enemies, but keep an eye on the wooden staircase and balcony at the far end of the street because that seems to be where Perry will respawn this time. Unfortunately it doesn't seem like you can really damage him, but hitting him with a few shots will see him disappear again.
A short time later Perry reappears on the water tower and takes another drink of his potion, exclaiming "Dammit, I've almost run dry. Okay, Swift, I've had enough of you now".
The battle continues and Perry's health will be back up to around half way while more enemies continue to swarm. Take them out as you build up your Deadeye meter and potentially rack up a nice combo bonus for some cash.
Perry will usually hang around on top of the water tower, or somewhere nearby, so look out for him and if you can get close to him, another couple of full rounds of Deadeye should be enough to take him out for good.

Once he's down, Jack unties Katie who falls into his arms telling him "That was incredible. You saved my life!". "All in a day's work. I only wish it were more financially gratifying" he responds.

"Well shoot, Mister, if getting yourself a little money is all you're worried about then, I know where someone with your talent could pick up five thousand dollars in gold without even trying!" she explains.

"Pray do tell, young lady, and I will be forever in your debt!" begs Jack. "There's a sharpshooter competition in Brimstone, winner takes all. Shouldn't be a problem for such a fine marksman like yourself" she responds.
The following rewards are unlocked on the score screen after passing the mission.
- Completion
- Bounty: Professor Perry - $150
- Good Rating
- Increase Maximum Health
- Excellent Rating
- Weapon Upgrade: Breech Loader
After completing the story, you'll be able to replay each mission in "Bounty Hunter Mode" which includes an optional objective to complete. Beating the mission and completing the objective will provide a reward.

- Objective
- Kill Atlas and get a combo for over $300.
- Reward
- Showdown Character: Perry + Shop Item: "Monocle"
Tips
In order to get a large combo, you're actually best off disabling the "Golden Gun" cheat and also ensure you select the weakest weapon you have when you start the mission. You don't want to kill enemies in one shot, you want to shoot them multiple times to increase their value before you kill them.
If you have these cheats unlocked, enable Invincibility and Infinite Deadeye. Then throughout the mission, keep using Deadeye to target the multiple enemies running around the place. Because Jack Swift has dual revolvers, you can lock on to 12 Deadeye targets each time. Target their hands and feet and spray bullets all over and you'll build up a huge combo if you keep the streak going, which is fairly easy to do with Deadeye. Infinite Deadeye makes this challenge a breeze and you should easily end up with a combo over $1000.
The game will tell you that you completed the challenge when your combo ends, although you'll still need to complete the mission and kill Perry. Once you see the combo has been achieved, turn on Golden Gun again to make the boss fight quicker and easier.
All Bounty Hunter challenges are much easier if you unlock and enable the "Invincibility", "Infinite Deadeye" and "Golden Gun" cheats. For more info, read about Cheats in Red Dead Revolver.
Next Mission
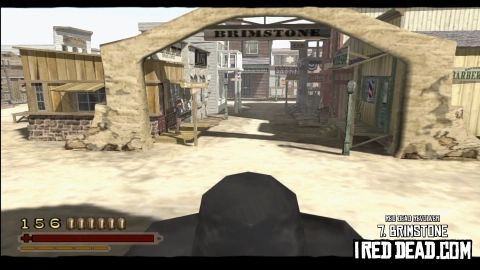
After this level, you'll end up back in the town of Brimstone which you can freely explore, talk to civilians and visit a number of shops to spend more of your hard earned cash.
While there, visit the Sheriff's office to start the next story mission.